

Removable Pulk Sled Poles
By Jason Loomis of Loomis Adventures
I recently began using a new pulk sled, the Pelican Snow Trek 60. For those unfamiliar, a pulk is a a toboggan used to haul gear like tents, sleeping bags, and food over snow usually pulled by a person on skis or snowshoes. They are very handy for getting larger amounts of gear into the back-country without having to break your back. Click here for an example of where a pulk was used to transport gear during a winter camping trip.
The first task after getting my Pelican Snow Trek 60 was to build some sort of pole system for pulling the pulk sled. As I was short on time, I wanted to build poles quickly with minimal cost. My cost was around $10 since I had some of the materials on hand already. The cost of the entire pulk pole system is around $20.
Materials:
1/2″ x 10′ SCH 40 PVC Pipe
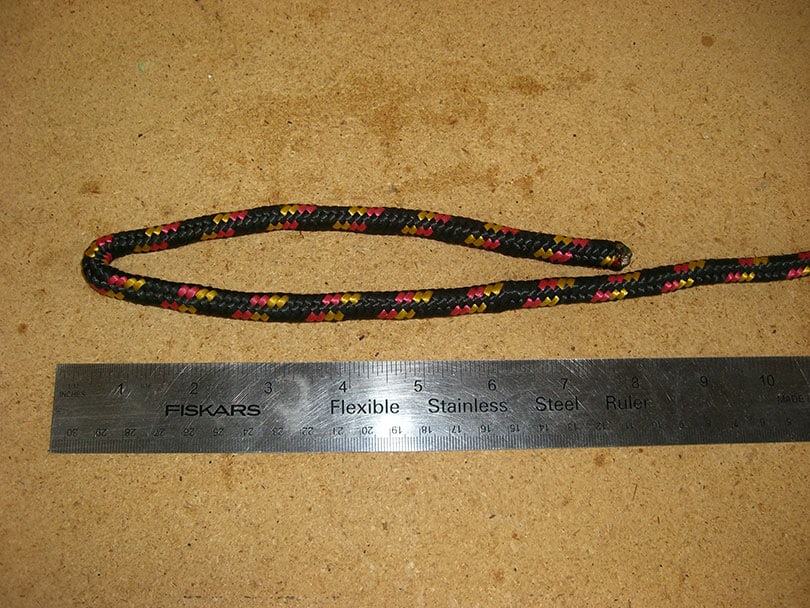
3/8″ Rope
18 ga. Aluminum Wire
Wire Nail
Electrical Tape or Shrink Wrap
(2) 1/4″ x 2″ Hitch Pins
(2) Small Carabiners
Velcro® Cable Wrap
Steps:
1. Cut the PVC pipe in half into two 5′ pieces.
2. Cut two lengths of 3/8″ rope about 6-1/2′ each.
3. Cut four lengths of 18 ga. aluminum wire about 18″ each. Galvanized wire can be substituted (aluminum is more corrosion resistant).
4. Take the first piece of 3/8″ rope and double it over at one end about 8″ as pictured below.
5. Carefully pierce both pieces of rope with the wire nail as illustrated below. The exact location is not critical. About 2″-3″ from the tag end is fine.

6. Push the nail out with one end of a piece of aluminum wire. The goal is to insert the aluminum wire through the hole in the rope created by the nail. Using a nail makes it easier to insert the aluminum wire through the rope.

7. Wrap the rope with the aluminum wire. Wrap one end toward the loop in the rope and the other toward the non-looped end of the rope.


8. Wrap the area covered by aluminum wire with electrical tape or cover in shrink wrap and shrink. This creates a smoother surface for passing through the center of the 1/2″ PVC pipe.


9. Insert the end of the rope without a loop into one of the 5′ pieces of 1/2″ PVC pipe that was cut in step 1. Pull the rope through so that about 1.5″-2″ of the loop end remains exposed.

10. On the end without a loop, double the rope over like in step 4, creating a loop about 1.5″-2″ long.

11. Tie something such as a piece of string to the finished loop from step 9. While holding the loop formed in step 10, pull the rope so the finished loop and attached string moves into the PVC pipe. Pull far enough so you have some room to work on the second loop.

12. Repeat steps 5-8. When finished with the second loop, slowly pull the string tied to the first loop back out of the pipe about 1.5″-2″. At this point you should have a 1.5″-2″ loop on both ends of the pipe
13. Repeat steps 4-12 to build the second pulk pole.
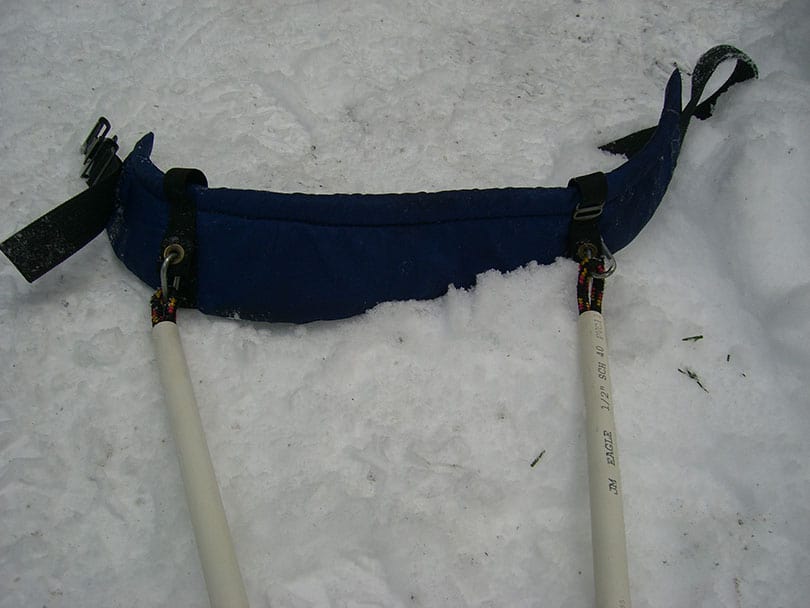
The images below illustrate the finished product on my pulk sled. The carabiners are used to connect the poles to a harness. The 1/4″ x 2″ hitch pins are used the secure the poles to the pulk. If you have a different sled, you will may need attachment system to link the poles and sled. Ed’s Wilderness Systems has details on how to make aluminum channels that bolt onto the sled. The hitch pin would then go through the aluminum channels. The Velcro cable wrap is used to hold the poles together in the center after they are crossed. Crossing the poles gives the pulk sled better handling. Please visit Loomis Adventures to see more details on winter camping with pulk sleds.


January 13th, 2011 | Tags: pulk, Winter Camping Gear | Category: Winter Camping Gear